Thinking about installing vinyl flooring in your home but unsure if it’s right for your space? At Lumber Liquidators, we’ve helped thousands of homeowners navigate the ins-and-outs of vinyl flooring, and along the way, we’ve gathered the most common questions people ask when it comes to this flooring type. Our Mega-FAQ here addresses everything you probably want to know -- from basic definitions to maintenance secrets -- so you can make the smartest purchasing decision possible.
UNDERSTANDING VINYL FLOORING
Q: What Is Vinyl Flooring Made Of?
Vinyl flooring is primarily made from synthetic plastic polymers in a layered construction: a wear layer on top that protects against scratches and stains, a printed design layer that gives the flooring its appearance, a core layer that provides stability and durability, and, often, a backing layer that provides cushioning and sound absorption. Various stabilizers, plasticizers, and fillers are added to enhance performance characteristics like flexibility, durability, and water resistance.
Q: What Are The Different Types Of Vinyl Flooring?
Vinyl flooring comes in several formats, including:
- Rigid Vinyl Plank (RVP): Durable, waterproof flooring made from a solid vinyl core; designed to be robust and mimic the appearance of wood or stone.
- Luxury Vinyl Plank (LVP): Similar to rigid vinyl plank, but with a thicker, more durable wear layer offering greater longevity, superior scratch resistance, and a higher-end aesthetic.
Each offers advantages depending on your space, budget, and installation preferences.
Q: Is Vinyl Flooring Waterproof? Can It Be Used In Bathrooms Or Kitchens?
Our vinyl flooring products are indeed waterproof, making them excellent choices for bathrooms, kitchens, laundry rooms, and basements. When combined with an underlayment, they offer improved sound and thermal properties, making them an even better fit for such spaces!
Q: Can Vinyl Flooring Be Used Outdoors? What About In Basements?
Vinyl has specific applications in challenging environments:
Outdoor Use:
- Standard residential vinyl is NOT recommended for full outdoor exposure
- Some commercial-grade products are rated for covered outdoor areas
- UV resistance is a major concern for outdoor applications
- Temperature extremes can cause expansion/contraction issues
Basement Applications:
- Vinyl is excellent for below-grade installations
- Moisture resistance makes it ideal for concrete subfloors
- Proper moisture testing and vapor barriers are essential
- Look for products with enhanced antimicrobial properties for damp environments
- Floating installations typically perform better in basements
For outdoor living spaces, consider products specifically designed for exterior use, which have enhanced UV protection and temperature stability.
Q: What Are Some Key Features Of Vinyl Flooring?
If you’re thinking vinyl, be sure to think about the following:
- Thickness: Ranging from 2mm to 8mm or more, with thicker options typically offering better durability and comfort.
- Wear Layer: Measured in mils (thousandths of an inch), with residential options typically 6-12 mils and commercial grades 20+ mils.
- Texture: From smooth to embossed with realistic wood grain or stone textures.
- Design Options: Numerous patterns replicating wood, stone, tile, or abstract designs.
- Installation Method: Click-lock floating systems, glue-down, or peel-and-stick.
- Core Construction: Stone polymer composites (SPC) differ slightly from their wood polymer composite (WPC) counterparts.
Q: What Is The Difference Between SPC And WPC Vinyl Flooring?
SPC (Stone Polymer Composite) and WPC (Wood Polymer Composite) are two types of rigid core vinyl flooring:
- SPC contains limestone mixed with PVC, creating a dense, stable core. It’s thinner but more durable, less susceptible to temperature changes, and often more affordable.
- WPC contains wood pulp mixed with PVC, resulting in a thicker, softer, and warmer feel underfoot. It tends to offer better sound absorption and thermal insulation.
Both are waterproof and suitable for most residential applications, with SPC often preferred for high-traffic areas and WPC for comfort-focused spaces.
Q: How Does Vinyl Compare To Hardwood, Tile, Or Laminate?
Understanding the key differences helps with decision-making:
Vinyl vs. Hardwood:
- Cost: Vinyl is typically 30-50% less expensive
- Water Resistance: Vinyl offers superior moisture protection
- Durability: Vinyl resists scratches better; hardwood can be refinished
- Property Value: Hardwood generally adds more resale value
- Lifespan: Quality hardwood can last 50+ years; vinyl typically 10-30 years
Vinyl vs. Ceramic Tile:
- Comfort: Vinyl is warmer and softer underfoot
- Installation: Vinyl is generally easier and faster to install
- Maintenance: No grout lines to clean with vinyl
- Durability: Ceramic is more scratch-resistant; vinyl is less prone to cracking
- Cost: Vinyl installation is typically less expensive
Vinyl vs. Laminate:
- Water Resistance: Vinyl is significantly more water-resistant
- Sound: Vinyl is typically quieter underfoot
- Comfort: Vinyl usually offers more cushioning
- Installation: Both offer DIY-friendly options
- Appearance: Both provide realistic wood looks, with higher-end vinyl often looking more authentic
Each flooring type has its place, with vinyl offering an excellent balance of performance, aesthetics, and value for most residential applications.
Q: How Long Has Vinyl Flooring Been Around, And How Has It Evolved?
Vinyl flooring first gained popularity in the 1950s as an affordable alternative to linoleum. Early versions were primarily sheet vinyl with limited designs. The technology has evolved dramatically since then, with major innovations including:
- 1970s: Introduction of no-wax wear layers
- 1980s: Improved printing technologies for more realistic patterns
- 1990s: Development of luxury vinyl tiles and planks
- 2000s: Introduction of click-lock installation systems
- 2010s: Development of rigid core technologies (SPC and WPC)
- 2020s: Advanced printing and texturing techniques creating remarkably authentic wood and stone visuals
Today’s vinyl flooring bears little resemblance to the products of previous generations, with significantly improved aesthetics, performance, and installation options.
Q: What Does The Wear Layer Rating Mean On Vinyl Flooring?
The wear layer is the transparent, protective top coating on vinyl flooring that guards against scratches, stains, and general wear. It’s measured in mils (1/1000 of an inch):
- 6-8 mils: Suitable for low-traffic residential areas like bedrooms.
- 12 mils: Good for medium-traffic residential use.
- 20 mils: Appropriate for high-traffic residential and light commercial applications.
- 28+ mils: Commercial-grade durability for business environments.
A thicker wear layer generally translates to better durability and a longer lifespan, though it may also impact the price.
Q: Are There Health Or Environmental Concerns With Vinyl Flooring?
Modern vinyl flooring has addressed many historical concerns through improved manufacturing processes. Key considerations include:
- VOCs (Volatile Organic Compounds): Look for products certified as low-VOC or zero-VOC, which minimize indoor air pollutants.
- Phthalates: Many manufacturers now offer phthalate-free vinyl options.
- Recyclability: While traditional vinyl can be challenging to recycle, some manufacturers now offer take-back programs.
At Lumber Liquidators, we offer many options that meet or exceed industry standards for environmental responsibility and indoor air quality.
CHOOSING THE RIGHT VINYL FLOORING
Q: How Do I Choose The Right Thickness For My Space?
Your choice of thickness should be based on your specific needs:
- 2-4mm: Economy options best for low-traffic areas or rental properties.
- 4-6mm: Standard residential thickness suitable for most household applications.
- 6-8mm: Premium options offering enhanced durability and comfort, ideal for high-traffic areas.
- 8mm+: Maximum comfort and sound insulation, often featuring WPC cores.
Commercial spaces typically require thicker products with commercial-grade wear layers.
Q: What Factors Should I Consider When Selecting A Color Or Design?
As always, you should keep the basic principles of interior design well in mind:
- Room Size: Lighter colors make small spaces feel larger; larger rooms can handle darker tones.
- Lighting: Natural light shows true colors; rooms with limited light may benefit from lighter flooring.
- Existing Décor: Consider your wall colors, cabinet finishes, and overall design style.
- Traffic Patterns: Busier patterns and medium tones hide dirt and wear better than very light or very dark solids.
- Timelessness vs. Trends: Classic wood tones offer lasting appeal, while bold patterns make stronger statements that might date more quickly.
Sample boards viewed in your actual space with your lighting can help you make confident decisions.
Q: How Do I Determine The Right Size Or Pattern For My Room?
Consider these factors when selecting plank or tile dimensions:
- Room Proportion: Larger rooms can accommodate wider/longer planks; smaller rooms often benefit from smaller formats.
- Visual Effect: Wider planks create a more contemporary look; narrower planks offer a more traditional appearance.
- Direction: Installing planks parallel to the longest wall or in the direction of natural light typically creates the most appealing visual.
- Pattern Variation: Higher-quality vinyl offers more unique patterns before repeats; look for products advertising greater design variation.
- Layout Options: Consider herringbone, diagonal, or other installation patterns for distinctive looks.
For most residential applications, planks 6-7" wide and 48" long offer a versatile, contemporary look that works in various spaces.
Q: How Do I Match Vinyl Flooring With My Home's Architectural Style?
Different architectural styles pair naturally with certain looks:
- Traditional/Colonial: Shorter, narrower planks in classic oak or maple tones.
- Farmhouse/Rustic: Weathered or distressed wood looks with prominent grain patterns.
- Modern/Contemporary: Longer, wider planks in greige tones or distinctive options like concrete looks.
- Coastal: Lighter, weathered wood appearances that evoke driftwood or beachy environments.
- Industrial: Concrete or slate looks, or darker wood tones with minimal variation.
Always consider your existing woodwork, cabinetry, and overall design scheme when selecting a complementary floor.
Q: Should I Choose Glue-Down Or Floating Vinyl Flooring For My Space?
Each installation method has distinct advantages:
Glue-Down Benefits:
- Maximum stability with minimal expansion/contraction.
- Better for large, open spaces or commercial applications.
- Often thinner, creating less height transition between rooms.
- Typically more cost-effective for the product itself.
Floating/Click-Lock Benefits:
- Easier DIY installation with no adhesives.
- Can be installed over more subfloor types.
- Usually faster installation time.
- Easier to replace individual pieces if damaged.
- Generally better sound absorption.
For most residential applications, click-lock systems offer the best balance of performance and installation ease, though glue-down may be preferred for areas with extreme temperature fluctuations or very large, open spaces.
Q: How Important Is The Underlayment For Vinyl Flooring?
Underlayment serves several important functions:
- Sound Absorption: Reduces noise transfer between floors.
- Comfort: Provides additional cushioning underfoot.
- Subfloor Irregularities: Helps smooth minor imperfections.
- Moisture Barrier: Some include vapor barriers for concrete installations.
- Thermal Insulation: Offers slight insulation value, especially important with concrete subfloors.
Many click-lock vinyl products now include attached underlayment, and for products without attached padding, the right underlayment can enhance performance significantly. Always use underlayment specifically approved for your flooring product, as incorrect materials can void warranties.
LONG-TERM VALUE
Q: How Much Does Vinyl Flooring Cost, And Is It Worth The Investment?
Pricing for vinyl products can vary based on their robustness:
Product Cost Ranges:
- Economy vinyl: $0.50-$2 per square foot
- Standard LVP/LVT: $2-$4 per square foot
- Premium luxury vinyl: $4-$7 per square foot
- Commercial-grade options: $5-$10+ per square foot
Installation Costs:
- DIY: Cost of tools and materials only.
- Professional: Typically $2-$5 per square foot depending on complexity.
Value Considerations:
- Durability: 10+ year lifespan depending on quality and wear layer.
- Maintenance savings compared to more demanding flooring types.
- Protection from potential water damage and costly repairs.
For most residential applications, mid-range luxury vinyl ($3-$5 per square foot) offers the best balance of quality and value, with wear layers in the 12-20 mil range providing appropriate durability for typical household traffic.
Q: Are There Additional Costs I Should Be Aware Of?
Beyond basic product and installation costs, consider:
- Subfloor preparation: Potentially significant for unlevel or damaged subfloors.
- Underlayment: If not included with the product (typically $0.30-$1.00 per square foot).
- Moisture mitigation: For concrete subfloors with moisture issues.
- Transition pieces and trim: Can add $1-3 per linear foot.
- Removal and disposal of existing flooring: Often $1-2 per square foot.
- Furniture moving: Either DIY or additional service cost.
- Baseboards: Replacement or repainting after installation.
A complete budget should include a 10% contingency for unexpected issues, particularly in older homes where subfloor conditions may be uncertain.
Q: How Do I Budget For Vinyl Flooring, Including Labor And Materials?
Effective budgeting includes these steps:
- Accurate measurements: Calculate square footage plus 5-10% waste factor.
- Product selection: Get specific pricing for your chosen vinyl option.
- Subfloor assessment: Factor in preparation costs.
- Accessory inventory: List all needed transition pieces, underlayment, etc.
- Labor quotes: If using professional installation, get detailed quotes.
- Tool costs: For DIY, factor in tool purchases or rentals.
- Removal costs: Include disposal of existing flooring.
- Contingency: Add 10-15% for unexpected issues.
Always get itemized quotes when using professional installation to understand exactly what’s included.
Q: Which Factors Affect The Long-Term Value Of Vinyl Flooring?
Key factors influencing the lifetime value equation include:
- Initial quality: Higher wear layer thickness can correlate with longevity.
- Installation quality: Proper installation prevents premature failure.
- Maintenance routine: Regular cleaning extends aesthetic lifespan.
- Environmental conditions: UV exposure and temperature fluctuations impact longevity
- Traffic levels: Areas with higher foot traffic may need higher-grade products
- Subfloor preparation: Properly prepared subfloors prevent many common problems
- Warranty coverage: Longer warranties typically indicate greater manufacturer confidence
Premium vinyl with proper installation and maintenance can provide excellent return on investment over 15-20+ years, often outperforming less expensive options that might require replacement sooner.
Q: How Does Vinyl Flooring Impact Home Resale Value Compared To Other Options?
Vinyl’s impact on property value has evolved:
- Historical Perception: Traditional vinyl was once considered a budget option
- Current Market: Modern luxury vinyl is now recognized as a desirable feature
- Comparison to Hardwood: Still typically adds less value than genuine hardwood
- Comparison to Laminate: Generally perceived as more premium than laminate
- Buyer Preferences: Increasingly appreciated for its combination of aesthetics and practicality
- ROI Considerations: Lower installation cost means potentially better return on investment
For maximum resale value, choose higher-end vinyl products with realistic appearances and premium wear layers.
Q: What's The Typical Lifespan Of Vinyl Flooring And How Can I Maximize It?
Vinyl longevity varies significantly based on several factors, but you can expect the selection at Lumber Liquidators to last for years to come. As for ways to give your floor the greatest chance at a long lifespan:
- Wear layer thickness: Each additional mil adds significant wear protection.
- UV protection: Prevents fading and degradation from sunlight.
- Proper underlayment: Reduces stress and potential damage from subfloor imperfections.
- Maintenance routine: Regular cleaning prevents abrasive particles from causing wear.
- Furniture protection: Pads and mats prevent concentrated pressure points.
- Temperature control: Maintaining consistent temperatures prevents expansion/contraction issues.
With proper care, premium vinyl flooring can maintain its appearance and performance for decades, making it a long-term investment in your home.
INSTALLATION
Q: Can I Install Vinyl Flooring Myself, Or Should I Hire A Professional?
You can install vinyl on your own, but you should always consider if DIY is the right option for you:
DIY-Friendly Scenarios:
- Click-lock floating systems in square/rectangular rooms.
- Moderate DIY experience with basic tools.
- Proper subfloor already in place.
- No complex cuts or transitions required.
Professional Recommendation Scenarios:
- Glue-down installations requiring precise technique.
- Significant subfloor preparation needed.
- Complex room layouts with many cuts and transitions.
- Commercial environments with specific warranty requirements.
Lumber Liquidators offers installation services through qualified professionals who understand the specific requirements of our products, ensuring proper installation and warranty protection.
Q: How Do I Install Vinyl Flooring?
General vinyl installation tips vary by product type…
Click-Lock Floating Systems:
- Acclimate the flooring for 48 hours in the installation space.
- Prepare a clean, dry, level subfloor.
- Install any required underlayment.
- Begin laying planks, connecting the locking mechanisms.
- Maintain proper expansion gaps around the perimeter.
- Install trim and transition pieces.
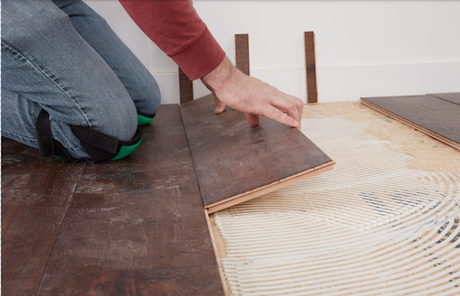
Glue-Down Method:
- Acclimate flooring and prepare a perfectly level subfloor.
- Apply appropriate adhesive with the recommended trowel.
- Lay vinyl into the adhesive within the working time.
- Roll the floor with a weighted roller.
- Allow proper curing time before walking on the floor.
Peel-and-Stick:
- Ensure a clean, smooth, primed surface.
- Remove backing paper and carefully position tiles/planks.
- Press firmly to activate adhesive.
- Cut edge pieces to fit.
Always follow the manufacturer’s specific installation instructions, as requirements vary by product.
Q: What Are Common Mistakes To Avoid When Installing Vinyl Flooring?
With just a few errors, you too can ruin your vinyl flooring installation…
Top Installation Pitfalls:
- Insufficient acclimation time.
- Inadequate subfloor preparation.
- Improper or missing expansion gaps.
- Using incorrect installation tools.
- Rushing through complex cuts and transitions.
- Ignoring manufacturer-specific instructions.
Project Planning Errors:
- Underestimating material needs.
- Choosing inappropriate products for specific environments.
- Neglecting moisture testing on concrete subfloors.
Careful research, proper preparation, and following manufacturer guidelines precisely are the best ways to ensure a successful installation that will perform as expected for years to come.
Q: What Tools Or Materials Do I Need For Vinyl Flooring Installation?
Essential tools and materials for vinyl flooring installations include…
For All Installations:
- Measuring tape
- Utility knife with fresh blades
- Straight edge or T-square
- Pencil for marking
- Spacers for expansion gaps
For Click-Lock Systems:
- Pull bar for tight spaces
- Tapping block
- Rubber mallet
- Jigsaw or circular saw for complex cuts
For Glue-Down:
- Appropriate adhesive
- Notched trowel (as specified by adhesive manufacturer)
- 100-pound roller
- Adhesive remover for cleanup
Additional Materials:
- Underlayment (if not attached)
- Moisture barrier (for concrete subfloors)
- Transition strips and moldings
Lumber Liquidators offers plenty of the tools you’ll need for successful DIY projects.
Q: Can I Install Vinyl Flooring Over Existing Tile Or Hardwood? What About Concrete?
Vinyl flooring can often be installed over existing surfaces, with some considerations:
- Ceramic Tile: Fill and level grout lines first; slight texture may show through thinner vinyl.
- Hardwood: Ensure the existing floor is stable with no loose boards; floating systems work best.
- Laminate: Similar to hardwood, ensure stability and consider an underlayment for sound absorption.
- Concrete: Must be clean, dry, and level; moisture testing is crucial, and vapor barriers may be necessary.
- Old Vinyl: Generally acceptable if securely bonded and level, though removal is often preferred.
The subfloor must always be clean, dry, level, and structurally sound. Some installation systems require specific subfloor preparations, so check manufacturer guidelines.
Q: How Do I Handle Transitions Between Vinyl Flooring And Other Materials?
Proper transitions enhance appearance and function:
Vinyl to Carpet:
- Use transition strips with a metal or plastic track and a beveled edge
- Ensure carpet is properly stretched to prevent buckling at the transition
Vinyl to Tile/Stone:
- Reducer strips accommodate height differences
- T-moldings work well for similar heights
- Consider waterproof transitions for bathrooms/kitchens
Vinyl to Hardwood:
- T-moldings for same-height transitions
- Reducers for height variations
- Match or complement wood tones for a cohesive look
Doorway Transitions:
- Threshold moldings specifically designed for doorways
- Baby threshold moldings for minimal height differences
Always leave proper expansion space at transitions and follow manufacturer guidelines for specific transition requirements.
Q: What Should I Know About Acclimating Vinyl Flooring Before Installation?
Proper acclimation prevents many post-installation issues:
- Duration: Minimum 48 hours, though some manufacturers recommend longer.
- Temperature: Maintain room at 65-85°F (18-29°C).
- Method: Stack boxes flat in small piles, not directly on concrete.
- Environment: The space should be at its normal living conditions (heating/cooling operating normally).
- Product-Specific Requirements: Some SPC/WPC products have different acclimation needs than traditional vinyl.
Particularly important is maintaining consistent temperature before, during, and after installation. Significant temperature changes can cause expansion or contraction leading to buckling or gaps.
MAINTENANCE
Q: What Cleaning Products Should I Avoid Using On Vinyl Floors?
Protect your investment by avoiding:
- Abrasive cleaners or tools: No scouring pads or highly abrasive powders.
- Wax-based products: These leave residue and can dull the finish.
- Oil soaps or oil-based cleaners: May create slippery surfaces and residue.
- Steam cleaners: Unless specifically approved by the manufacturer.
- Ammonia or highly alkaline cleaners: Can damage the wear layer.
Instead, use pH-neutral cleaners specifically formulated for vinyl flooring or simple solutions of water with a few drops of dish soap.
Q: How Do I Prevent Furniture From Damaging My Vinyl Flooring?
Protect against furniture damage with these strategies:
- Furniture pads: Use high-quality felt pads under all furniture legs.
- Chair mats: Place specially designed hard surface mats under rolling chairs.
- Proper moving techniques: Lift heavy furniture, don’t drag it.
- Weight distribution: Use broader supports under heavy items.
- Protection during moves: Cover floors with appropriate protection when moving large items.
- Regular maintenance: Replace worn furniture pads before they can cause damage.
For extremely heavy furniture or appliances, consider using special load-distributing plates during installation and when moving items.
Q: How Do I Handle Scratches, Scuffs, Or Dents On Vinyl Flooring?
Addressing common damage effectively:
For Minor Scratches:
- Vinyl-specific repair kits matched to your floor color.
- Specialized fill compounds for larger scratches.
- Burnishing techniques that blend minor scratches.
For Scuffs:
- Most surface scuffs can be removed with appropriate vinyl cleaners.
- Tennis ball buffing for rubber scuff marks.
- Microfiber cloths with slight dampness for stubborn marks.
For Dents:
- Heat treatment with hair dryer can help some dents recover.
- Severe dents in click-lock systems may require plank replacement.
- Preventative furniture pads prevent most denting issues.
For extensive damage, keeping spare material allows for selective replacement of the worst affected areas without redoing the entire floor.
Q: How Do I Know If My Vinyl Flooring Is Damaged Or Needs Replacement?
Recognizing when it’s time for new flooring:
Signs of Significant Damage:
- Wear layer worn through to the print layer (pattern fading/wearing off).
- Widespread cracking or splitting.
- Delamination (separation of vinyl layers).
- Persistent curling edges or seam separation.
- Subfloor damage causing structural issues.
- Widespread discoloration that cannot be cleaned.
Cosmetic vs. Functional Issues:
- Minor scratches or scuffs are generally cosmetic.
- Water seeping through seams indicates functional failure.
- Uneven wear patterns might be addressed with area rugs.
With proper selection and installation, quality vinyl flooring should last years in residential settings before replacement becomes necessary.
Q: What Should I Do If I Spill Something On My Vinyl Flooring?
Responding quickly to spills preserves your floor’s appearance:
For Water-Based Spills:
- Blot immediately with absorbent cloth.
- Clean with damp microfiber cloth.
- Dry thoroughly.
For Sticky Spills:
- Remove excess without spreading.
- Clean with manufacturer-recommended cleaner.
- Rinse with clean, damp cloth.
For Challenging Spills:
- Red wine/juice: Blot, then clean with mild detergent solution.
- Nail polish: Blot with non-acetone remover on cloth (never pour directly).
- Paint: Water-based can be cleaned while wet; dried paint may require specialized removers safe for vinyl.
- Oil/grease: Dish soap solution specifically targeting grease.
The waterproof nature of quality vinyl makes most spills easy to address if handled promptly.
Q: Why Is My Vinyl Flooring Making Noise Or Clicking Sounds?
Addressing sound issues effectively:
Common Causes and Solutions:
- Uneven subfloor: Requires leveling compound or additional underlayment
- Insufficient expansion space: Create proper gap around perimeter.
- Temperature fluctuations: Maintain consistent climate control.
- Loose locking mechanism: May require reinstallation of affected area.
- Walking technique: Some sounds may result from shuffling or dragging feet.
Prevention Strategies:
- Use quality underlayment with sound-dampening properties.
- Ensure proper acclimation before installation.
- Follow manufacturer guidelines for expansion space.
- Maintain room temperature between 65-85°F (18-29°C).
Most noise issues can be prevented through proper installation, making professional installation worth considering for quieter results.
Q: What's The Best Routine For Maintenance?
Follow this schedule for proper maintenance of your vinyl flooring:
Daily/Weekly Routines:
- Regular sweeping or dust mopping to remove abrasive particles.
- Prompt cleaning of spills to prevent staining.
- Damp mopping with manufacturer-approved cleaners.
Monthly Maintenance:
- More thorough cleaning with appropriate vinyl cleaners.
- Inspection for any developing issues.
- Check and replace worn furniture protectors.
Seasonal Care:
- Deep cleaning in spring and fall.
- Humidity control during extreme seasons.
Long-Term Considerations:
- Rotate area rugs to ensure even exposure and wear.
- Periodically schedule professional cleaning for heavily soiled areas.
- Engage in preventative maintenance rather than reactive repairs.
With consistent care, premium vinyl flooring can maintain its appearance and performance for decades.
VINYL FLOORING AT LUMBER LIQUIDATORS
Q: Where Can I Find Vinyl Flooring That Fits My Home And Budget?
Lumber Liquidators offers one of the best-curated selections of vinyl flooring options around. Our specialized focus on flooring means we can provide:
- Exclusive collections not available elsewhere.
- Unbeatable pricing in multiple categories.
- Knowledgeable staff focused solely on flooring.
- Comprehensive selection across all price points.
- Professional installation services.
Check out our assortment here on the web, or visit any of our store locations nationwide to explore our full vinyl flooring collection in person.
Q: Can I Find Vinyl Flooring Samples At Lumber Liquidators?
Of course you can, and we invite you to take a few home with you! Remember, to make the most of your samples, you should:
- View in your actual space with your lighting
- Place alongside existing elements (cabinets, furniture)
- Check appearance at different times of day
- Consider the view from different heights and angles
We recommend collecting samples of your top 3-5 choices to compare side-by-side in your home environment, as flooring appearance can vary significantly under different lighting conditions.
Q: How Do I Get Started With Buying Vinyl Flooring At Lumber Liquidators Today?
Buying floors at Lumber Liquidators has always been simple and straightforward:
- Browse our selection online, or visit a store to see our inventory up close.
- Review our buying guides and speak with our flooring experts.
- Take home samples of your top choices.
- Purchase your materials and arrange for delivery (along with installation, if you choose the professional route).
Our associates can guide you through each step of the process, ensuring a smooth experience from selection to installation and beyond.
Ready to upgrade your space? Explore Lumber Liquidators’ vinyl flooring options and find the perfect fit for your home! Visit your local store or browse online at LumberLiquidators.com to get started today.
This guide is intended to provide general information about vinyl flooring. Product specifications, installation requirements, and warranty details may vary by manufacturer. Always refer to specific product documentation and consult with flooring professionals for guidance related to your particular situation.